


Cotton vs containers, paper vs plastic, freeze vs refrigerate, and what about bread boxes? Anneka Manning, one of Australia’s leading bakers and founder of BakeClub reveals her exclusive tips for successfully storing bread (including her experience with our Organic Bread Swag!), so you can get the most out of your favourite loaf including retaining a crisp crust and preventing excess moisture loss, while also avoiding unwanted mould. Plus, the QUEEN of baking herself is sharing with us her favourite Hot Cross Bun recipe - just in time for Easter.
1. What is the difference between artisan bread and bread you get at the supermarket?
Artisan bread is usually defined as bread that is made on a small scale, usually by hand, and with all-natural ingredients (no preservatives or additives) and if often leavened using wild yeast in the form of a sourdough starter rather than commercial yeast. Supermarket bread is generally made in large bulk quantities using commercially made yeast and additives and preservatives to not only extend the shelf-life but also to boost the flavour and look of the bread. Artisan bread is therefore generally a more natural product and, because of this, will stale more quickly. However, it almost always will have a better flavour and texture and is better nutritionally when compared to its commercially made counterpart.
2. Is it better to avoid purchasing or storing bread that comes in plastic packaging? If so, why?
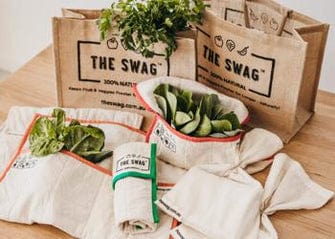
Often bread is sold in plastic bags designed to store it in which helps to extend the shelf life of that particular bread. I personally prefer to buy bread without plastic bags where possible and store it in paper, cloth or an Organic Bread Swag.
3. What is the best way to keep your bread fresh for longer?
Bread made without preservatives is often best eaten as fresh bread within a day or two of being baked or toasted for up to 4-5 days, depending on the bread type. It is best stored in a cloth or paper bag at room temperature to retain a crisp crust. An airtight container will help marginally retain the freshness of the crumb, but the crust will become soft on storing and there is a chance for the bread to sweat and become mouldy in hot humid conditions. As an alternative you can freeze your rolls or sliced loaf in an airtight container for up to 3 months. Toast slices straight from the freezer or thaw slices, rolls or whole loaves at room temperature.
4. What was your experience like using the Organic Bread Swag?
My first experience with the Organic Bread Swag was storing some homemade hot cross buns. I compared it at the same time with storing some of the buns also in an airtight container and a paper bag. The crumb remained moister than the paper bag but didn’t sweat like the ones in the airtight container. I’ve since been using it for both homemade and bought sourdough loaves also and love it for storing these too!
5. Would you recommend budding bakers to use the Organic Bread Swag?
Yes, not only is it reusable, all natural and environmentally responsible it will keep your homemade bread in optimum condition for as long as it is possible.

6. Any tips for what to do when your bread is starting to go hard/stale?
Oh so many! I have lots of go-to recipes, such as my Bread and Butter Pudding or French Toast. You can also easily make breadcrumbs and store them in the freezer until you need them, make garlic bread with lashings of garlic butter layered between the slices, or toast cubes of bread until crisp to make croutons and serve with soup!
Also remember that if the bread is only slightly stale you can often revive it by sprinkling it with a little water, wrapping in foil and placing on the oven rack in an oven preheated to 160°C (140°C fan-forced) for 10-30 minutes (depending on the size of the roll or loaf)
7. Any hacks/tricks for the novel baker when starting out in making their own bread? The temperature at which you prove your bread at is key. Yeast doughs need to be left in a warm, draught-free place to prove after kneading, and usually again after shaping. Proving is important as it ‘exercises’ the strands of gluten, making them stronger and helping to develop the structure of the bread. It also develops flavour. Yeast is at its happiest between 25°C–28°C. This means, depending on the weather and the temperature of your kitchen, you may need to create a warm micro-environment to prove your dough, particularly on very cold days. There are a number of ways you can do this:
- Pour some hot tap water into a saucepan and place the dough in a covered heatproof bowl over it, making sure the water doesn’t touch the bowl and replacing the hot water as it cools.
- Place the dough in a covered bowl in the microwave oven with the door closed (or in a sealed Styrofoam box) with a small jug of boiling water. Replace the water when it cools.
- Turn just your pilot light on in your oven to heat your oven very gently. Place the dough in a covered heatproof bowl on the middle rack, close the door and leave to prove.
- Place the dough in a covered heatproof bowl on a wooden board on top of a preheated oven.
- Place the dough in a covered heatproof bowl in a sunny windowsill or a spot outside in dappled sunlight (as long there is no draught).
Follow @bakeclub_australia and join the BakeClub community for free to receive our regular newsletter as well as plenty of other baking inspiration! BakeClub has a full range of both online and face-to-face workshops on offer here, including a Bread and Yeast full-day workshop in May and you can find out more about it here.